What are Assembly Groups
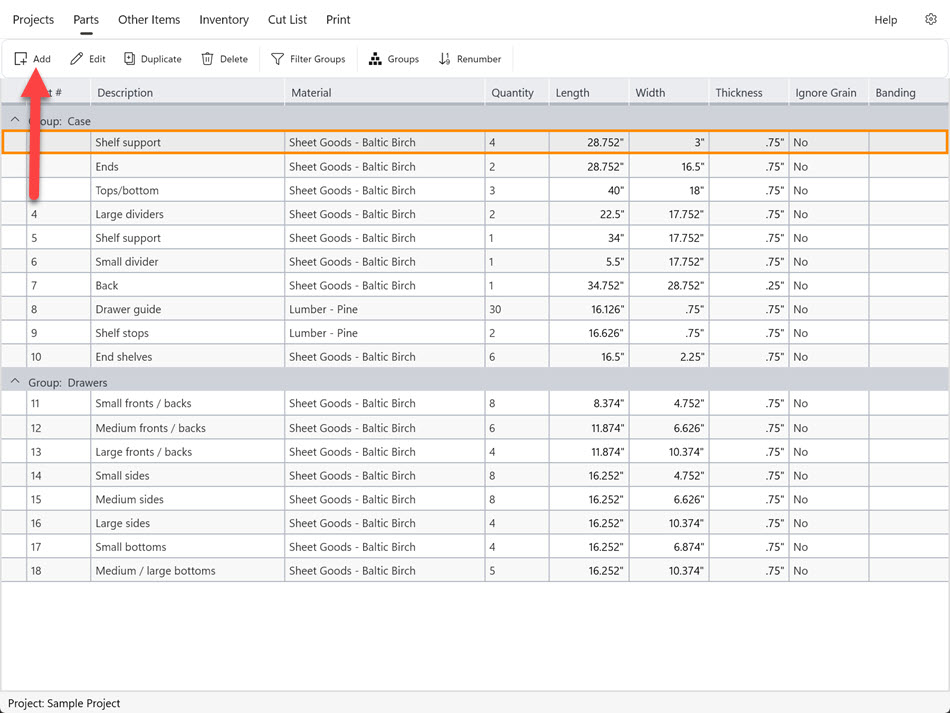
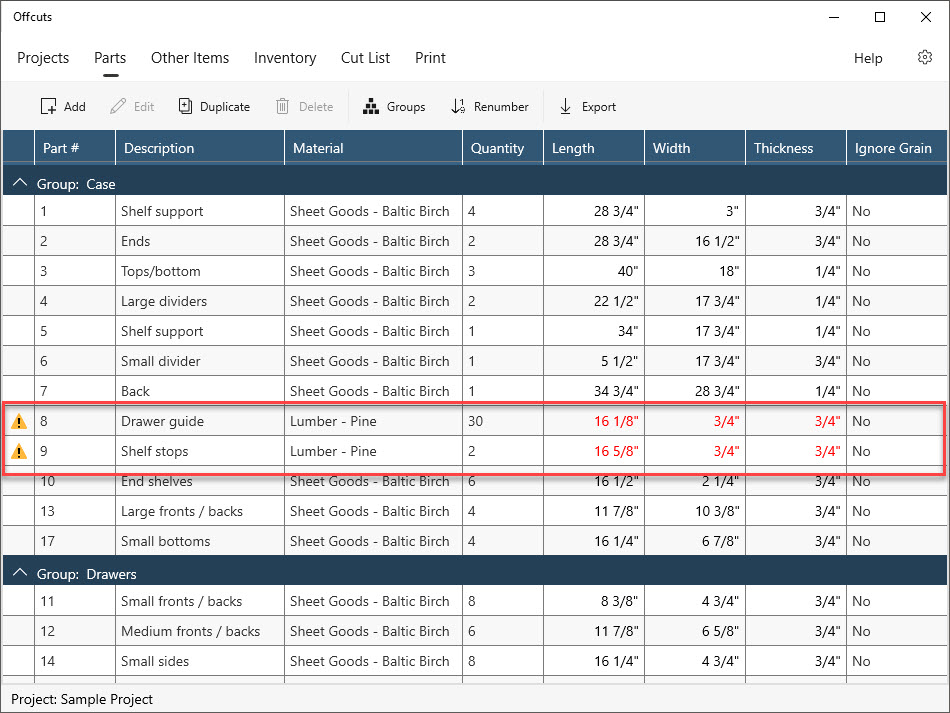
Working with a project containing many parts, such as a bookcase with 76 individual pieces, can make it difficult to understand the function and placement of each component. For instance, identifying which parts belong to the frame, drawers, or doors isn't immediately obvious from the part names alone. This is where Assembly Groups become invaluable.
Assembly Groups provide a way to organize parts within a project, improving visualization and understanding. In the bookcase example, you could create groups such as "Frame," "Drawers," and "Doors." As you add or modify parts, you assign them to the appropriate group. This clarifies the project structure; for instance, the "Frame" group might contain 34 parts, "Drawers" 18, and "Doors" 24, out of a total of 76 parts.
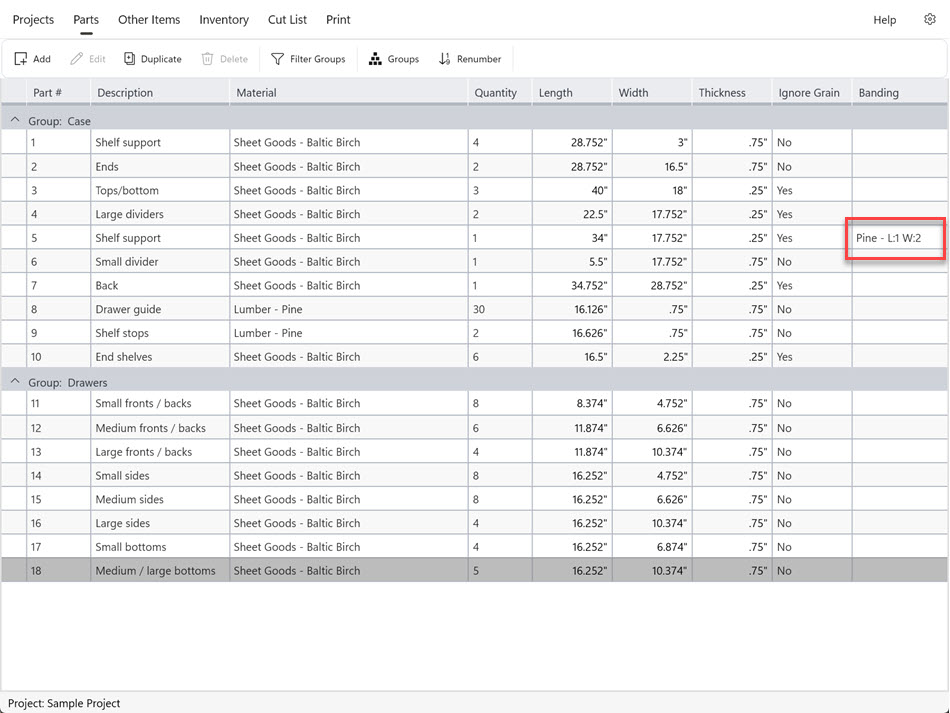
The benefits of Assembly Groups extend beyond the parts list. They also enhance the clarity of cut lists by color-coding parts according to their group assignment. This makes it significantly easier to identify the usage of each part within the overall project.
Create
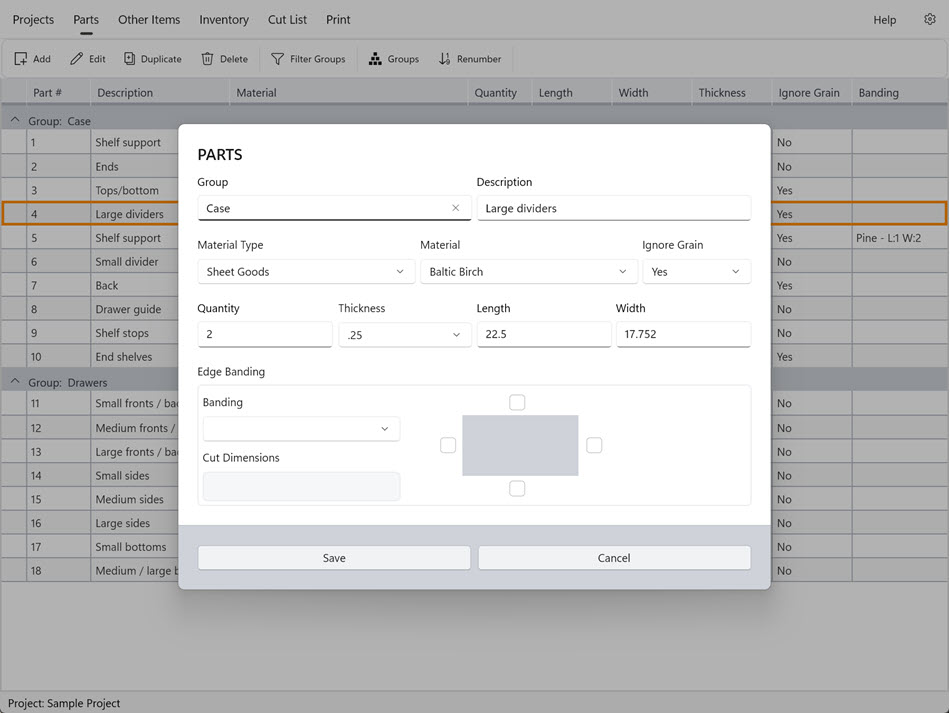
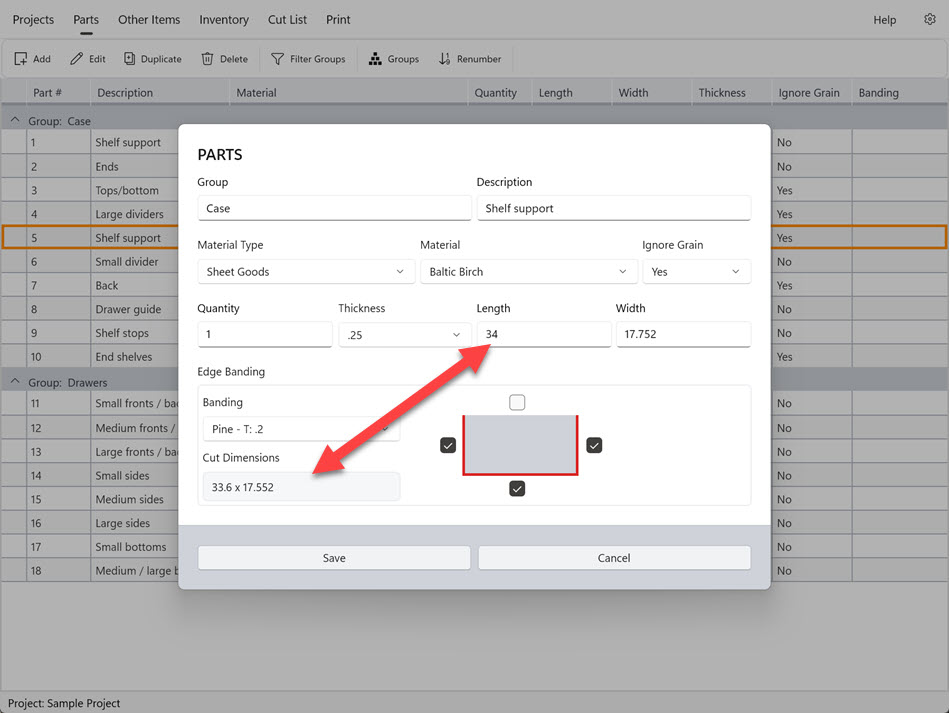
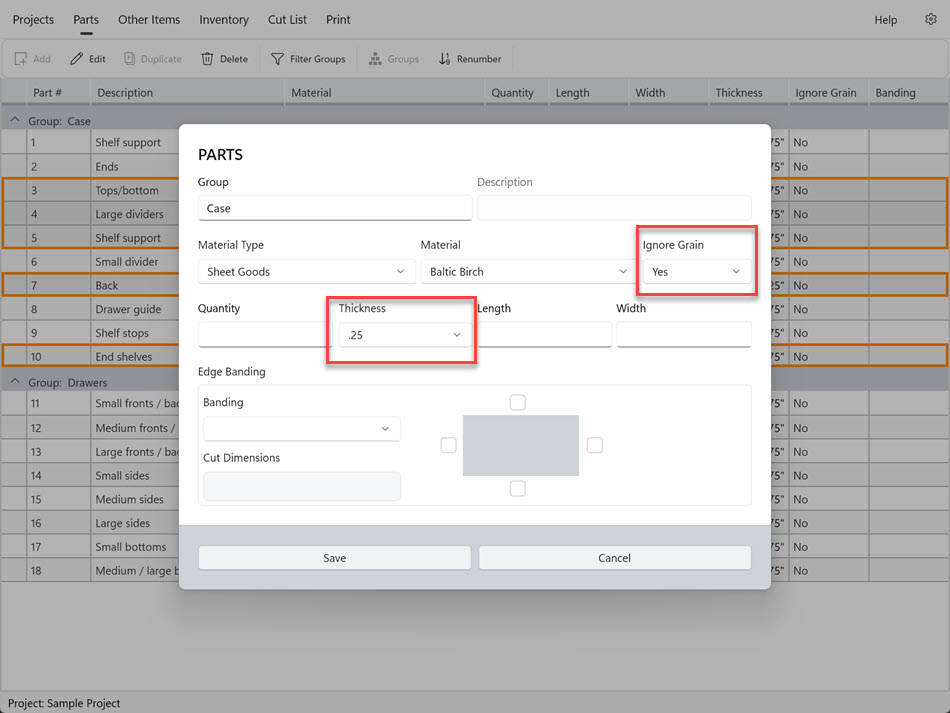
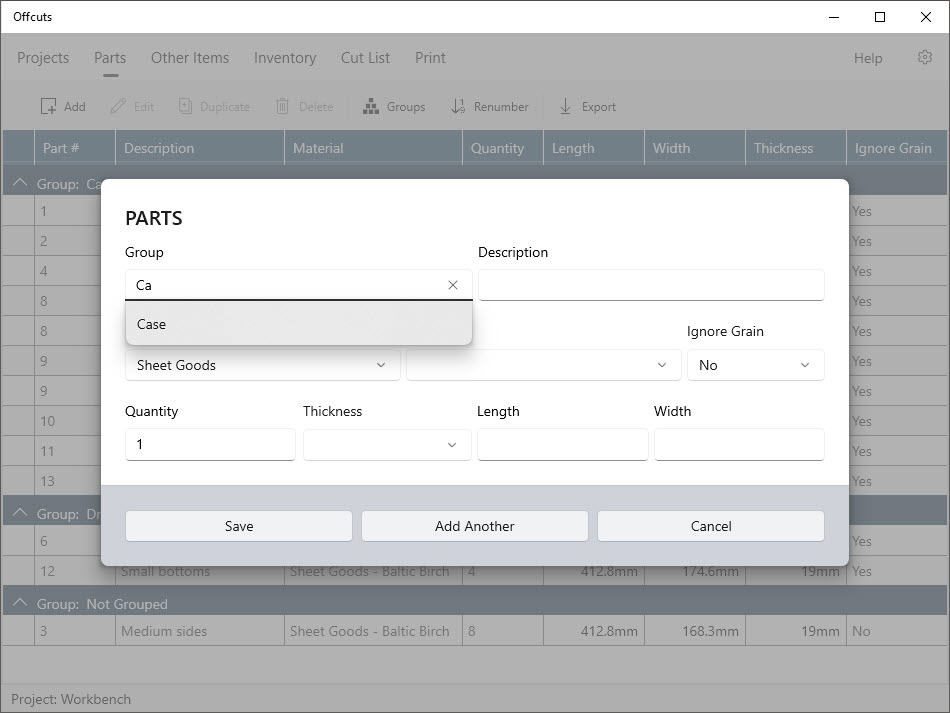
You can create an Assembly Group in two ways. The first method involves typing the group name directly into the Parts dialog. As you type, the dialog will offer suggestions based on existing groups. If the group name you enter is new, the system will create it automatically.
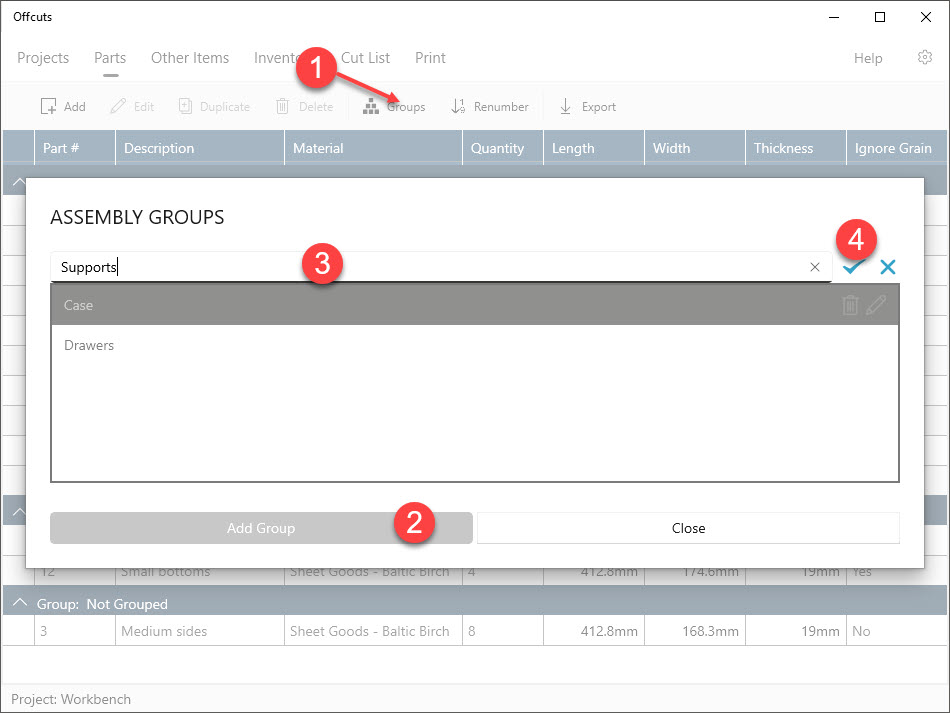
Alternatively, you can create an Assembly Group by clicking the "Groups" button, then selecting "Add Group." Enter the desired group name and confirm by clicking the checkmark button
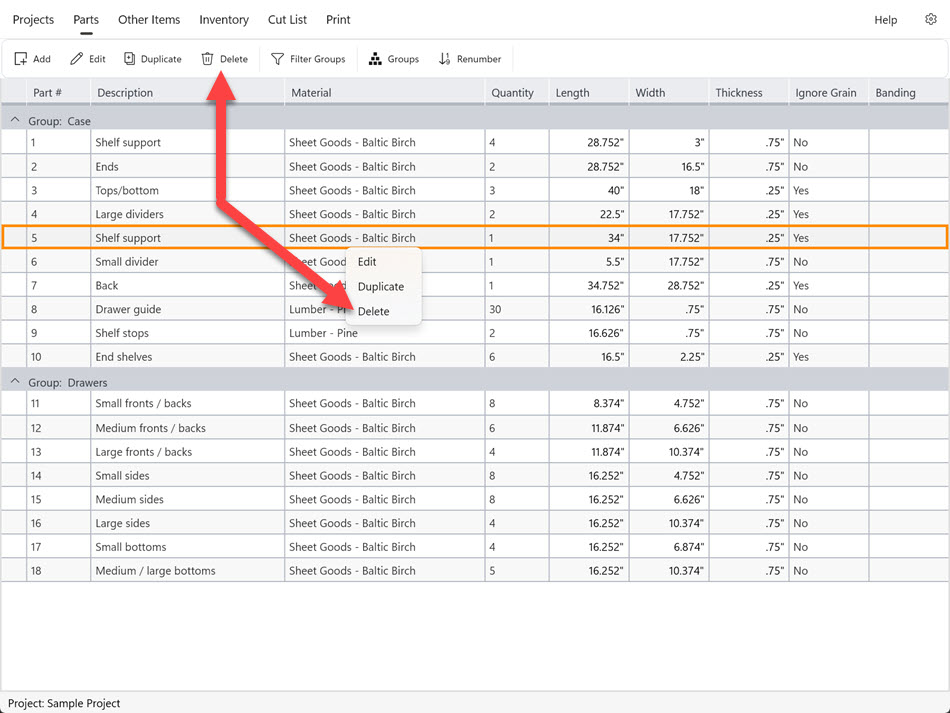
Rename/Delete
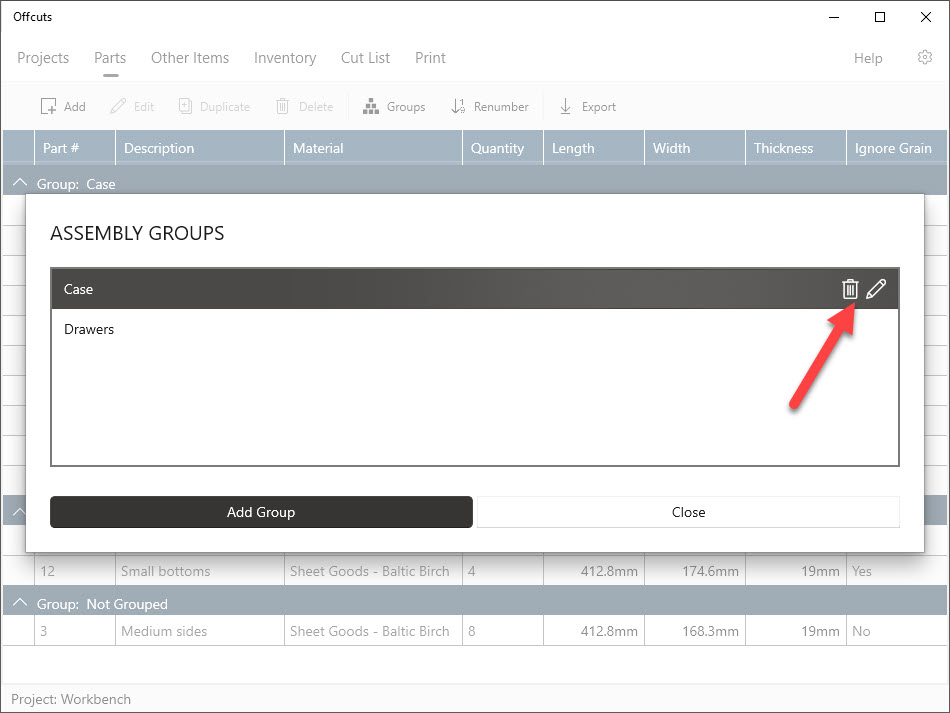
To rename or delete an Assembly Group, click the "Groups" button, select the target group, and then use the appropriate button to rename or delete it.
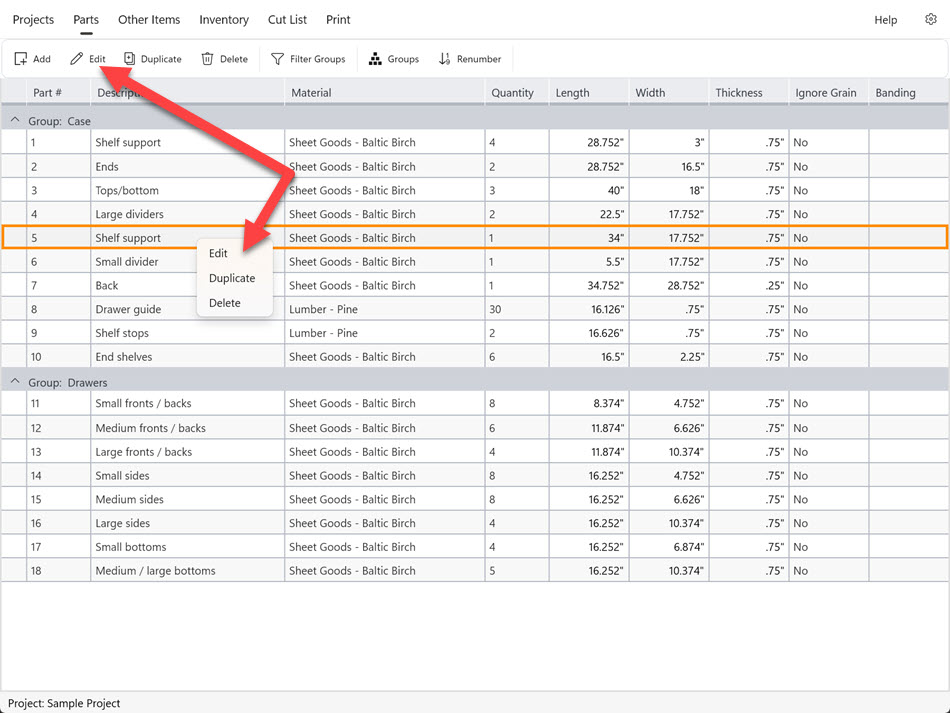
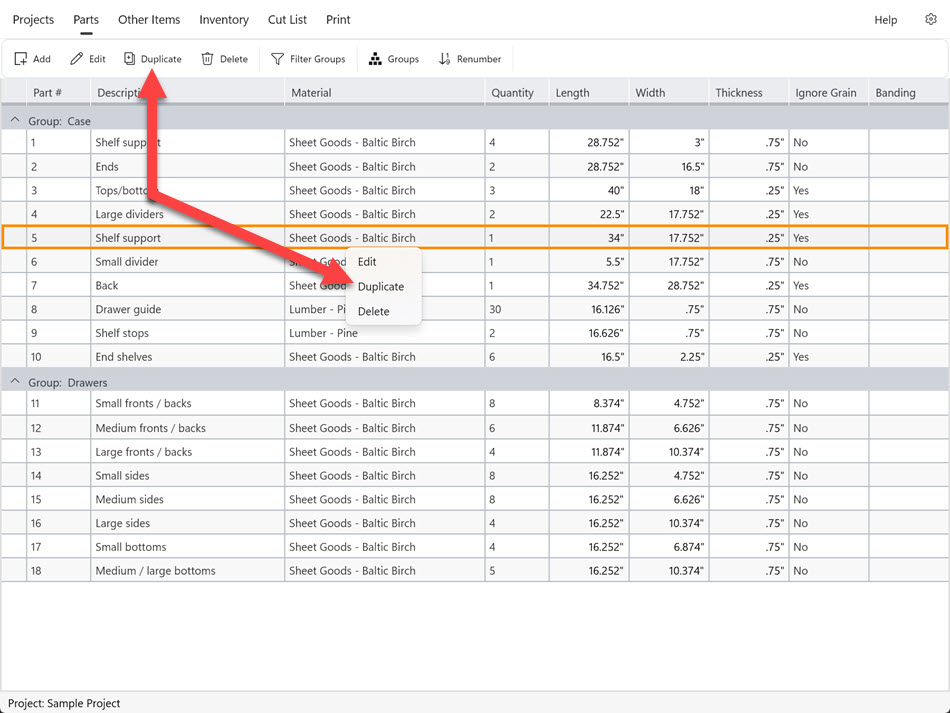
Assign a part to a group
In the Parts dialog, type the name of the desired group. The edit box will offer suggestions from existing groups as you type. Offcuts will create the group if it doesn't already exist.