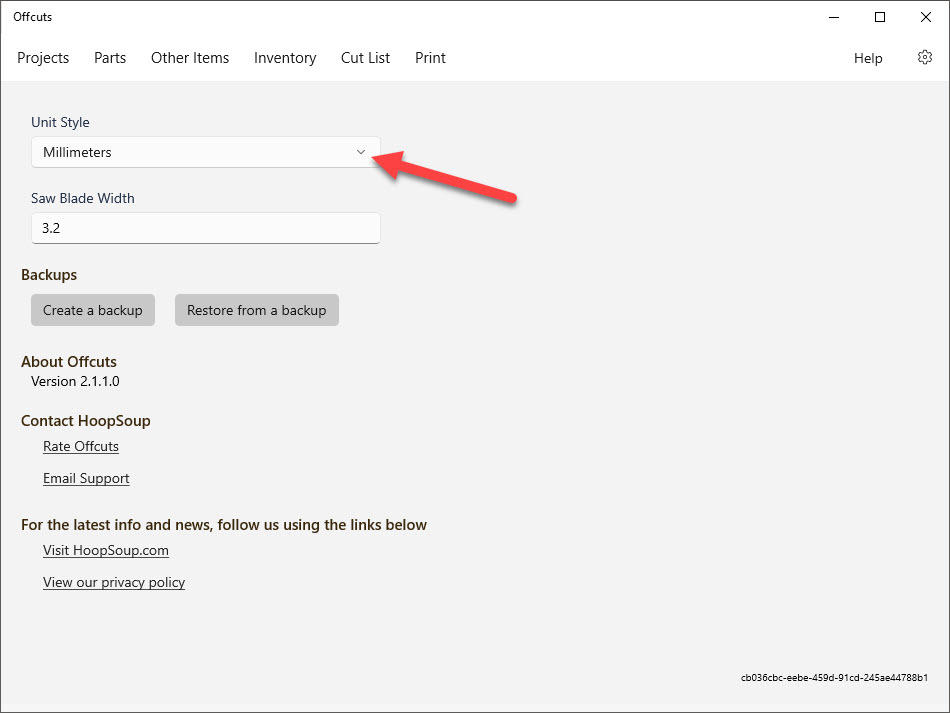
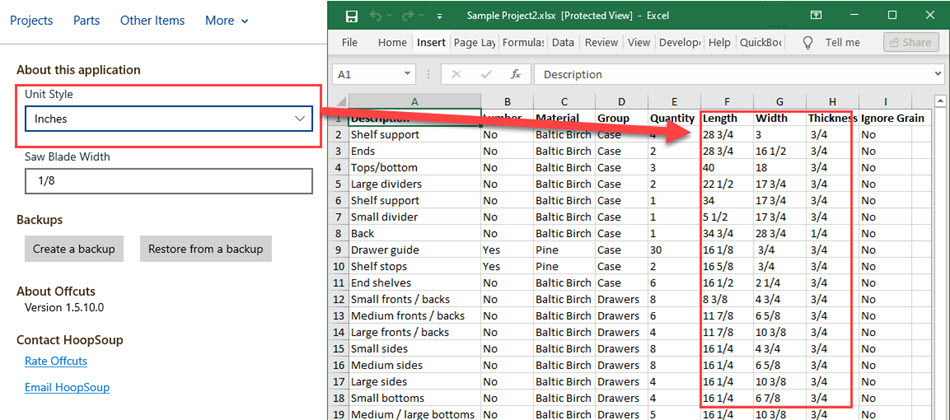
Click on the unit style to select the appropriate unit type.
Setting the blade/kerf width
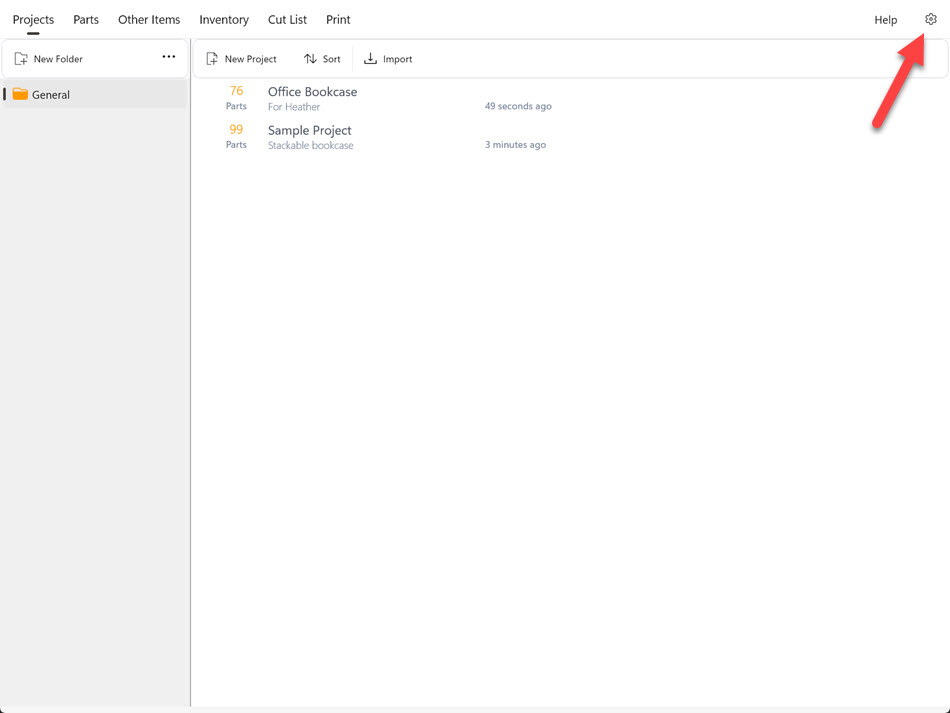
On the Projects screen, tap the gear icon
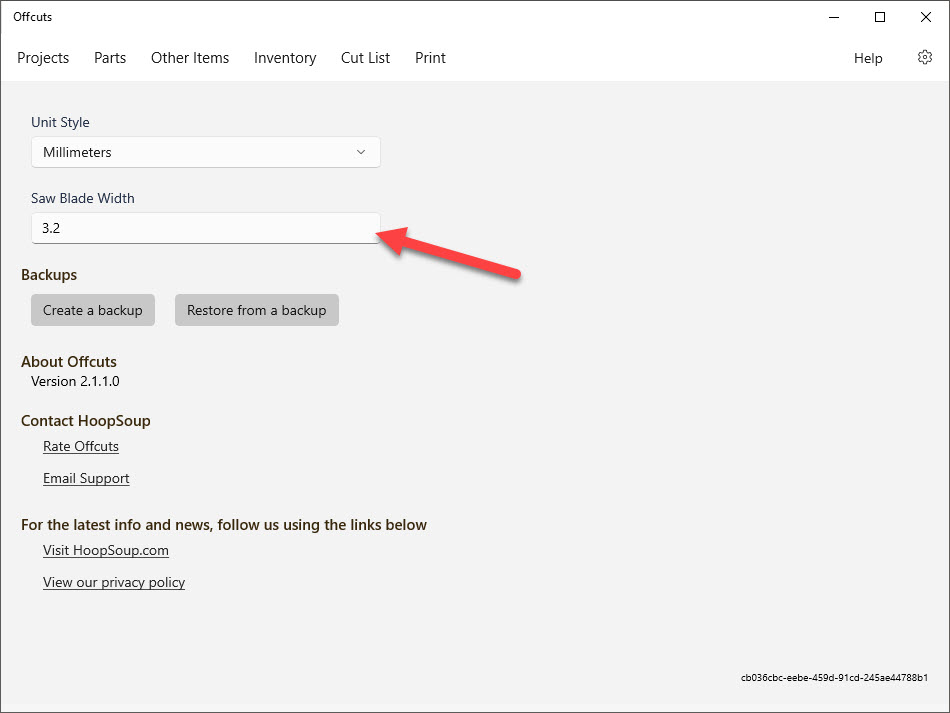
Click on the Saw Blade Width box.
Note
Blade width must be less than 1/2 an inch or 12mm
Project Management
Creating a project
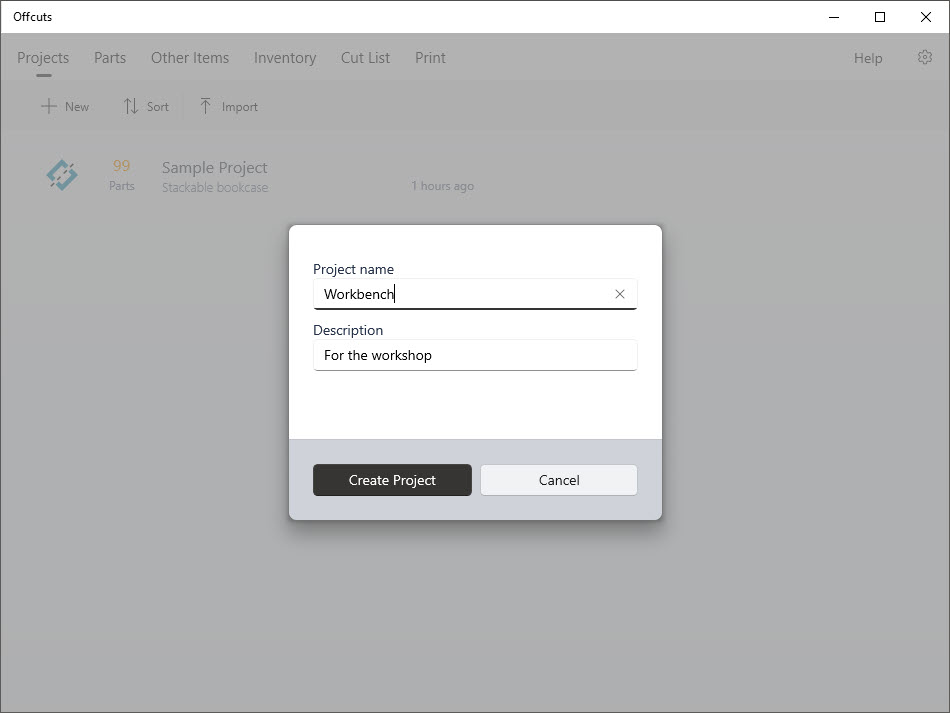
Click on the Add Project button
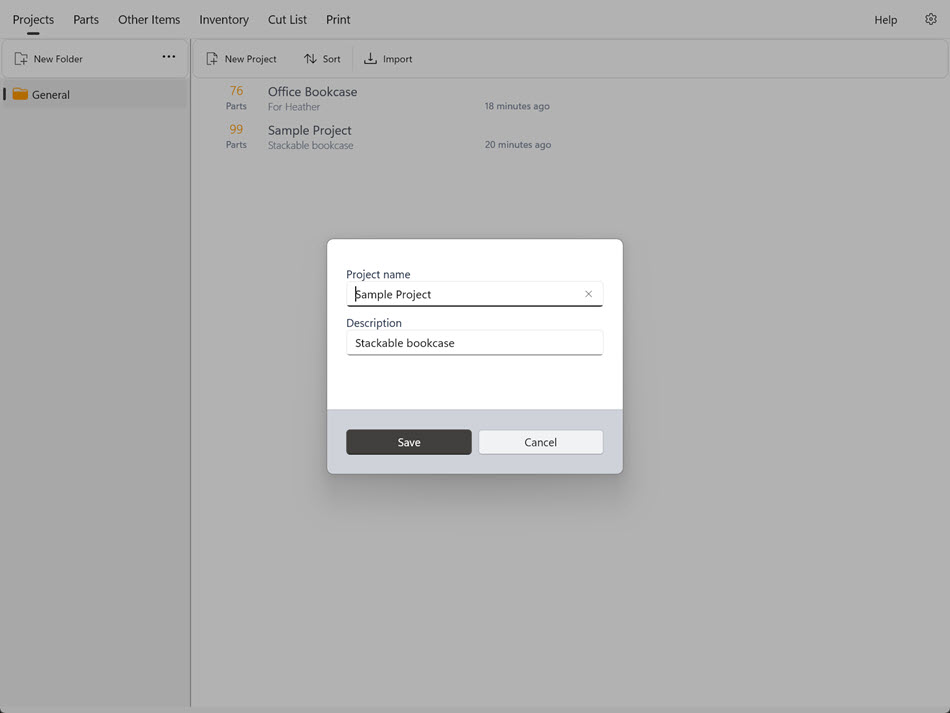
Enter the project name, and optionally add a description.
Note
The project name must be unique
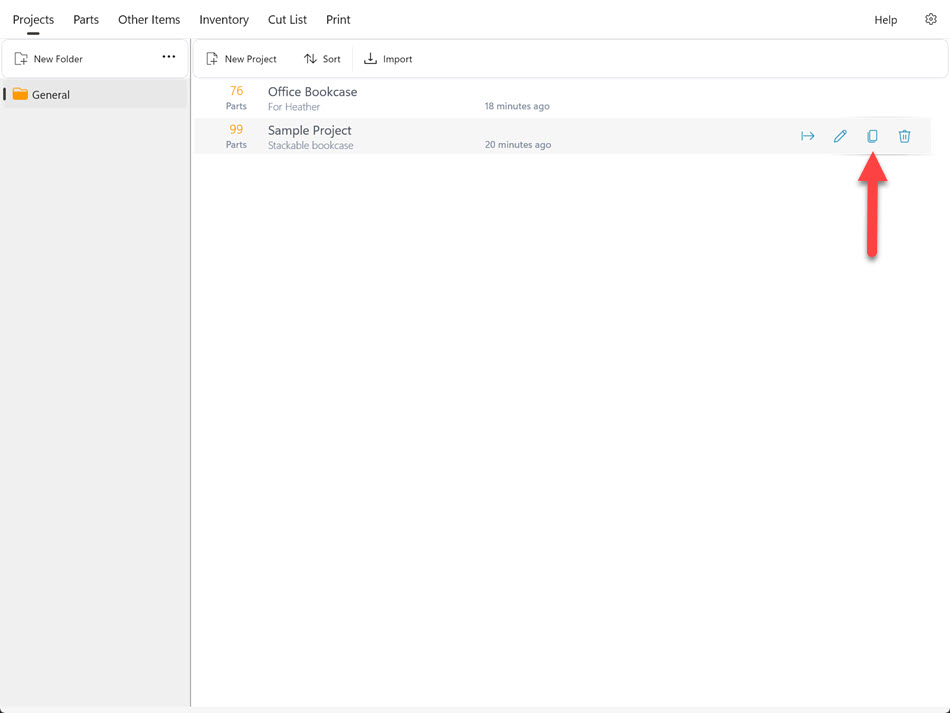
Copying/duplicating a project
Hover over the project you wish to copy and click the Duplicate button
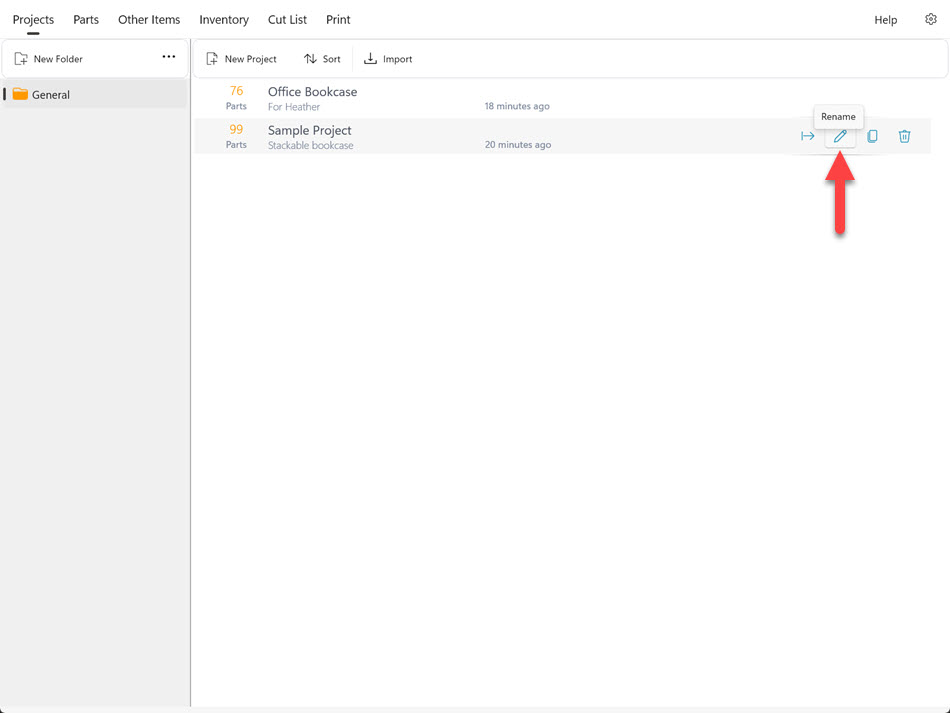
Renaming a project
Hover over the project you wish to copy and click the Rename button
Enter the name and/or description for the project.
Note
The project name must be unique
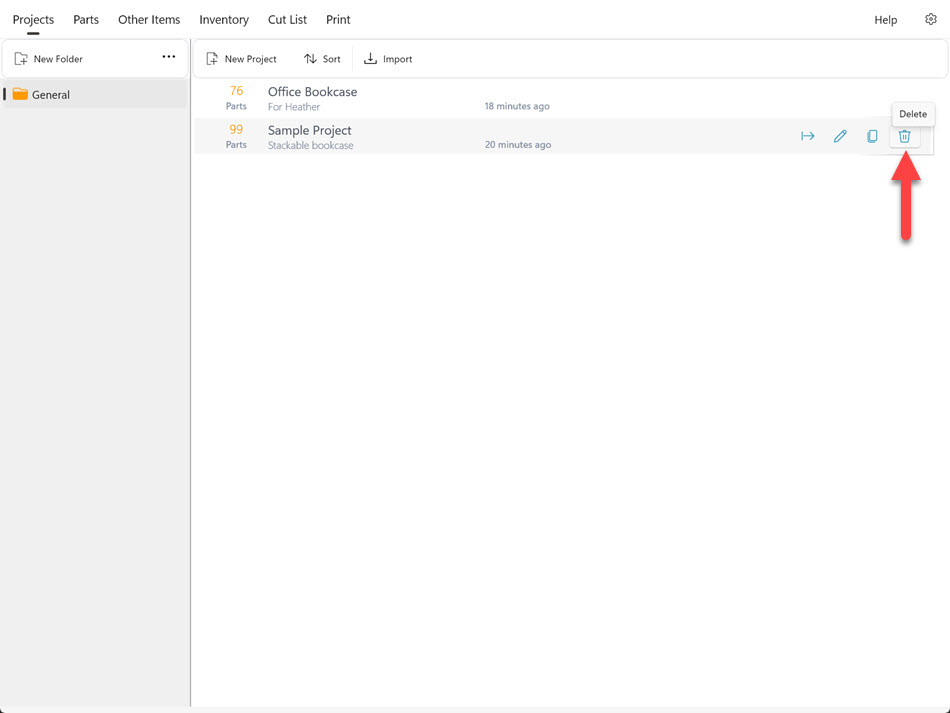
Delete a project
Hover over the project you wish to copy and click the Delete button
Project Folders
Folders help you organize your projects by category. To add a new folder, click the "New Folder" button. To delete or rename a folder, click the ellipsis (three dots) button and select the desired action from the menu
To create a new project in a particular folder, select that folder first.
Move a Project to a Different Folder
Move projects between folders by dragging and dropping their files.
Note
If you choose "No" when deleting a project, instead of deleting all projects, the project will be moved to the general folder.
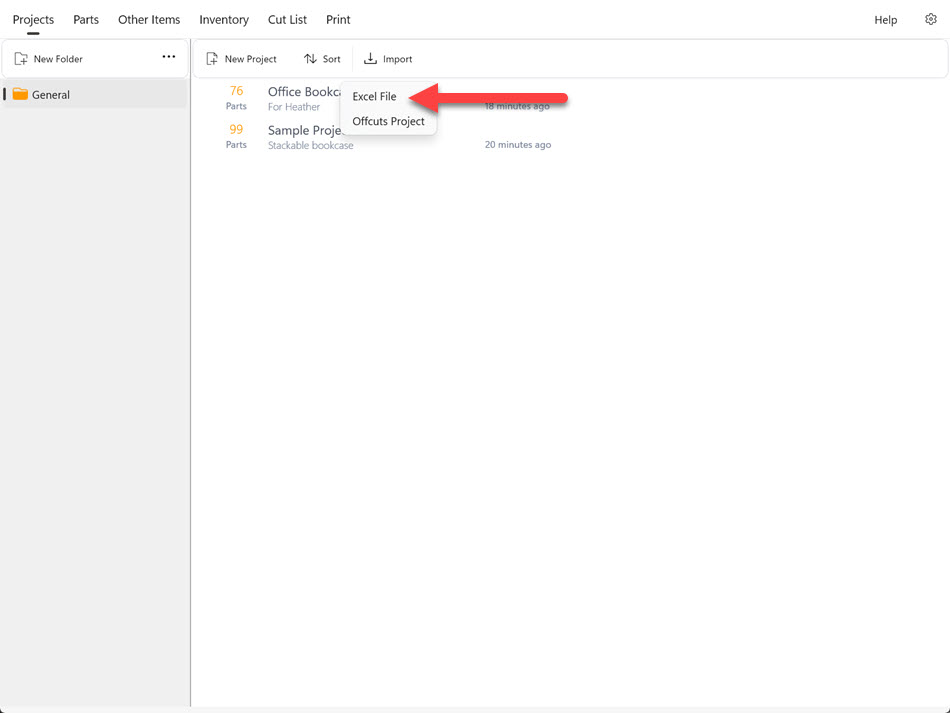
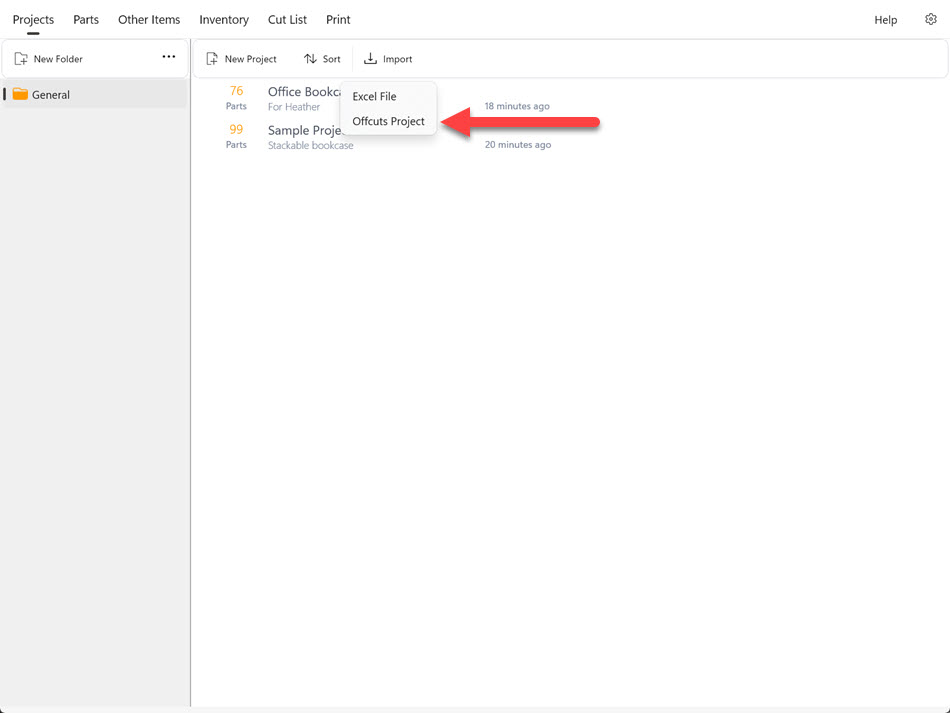
Importing from Excel
Importing
Go to the Projects screen, click the import button, and then select Excel.
Prerequisites
To import successfully, your Excel file must be in the correct format. The column names and their order must match the example provided; otherwise, you'll receive an error message
Click the Export button, then select "Export to Excel".
The length, width, and height values in your Excel file must match the settings in the application. For example, if the Offcuts settings are configured for decimal inches, the corresponding values in your Excel file must also be in decimal inches.
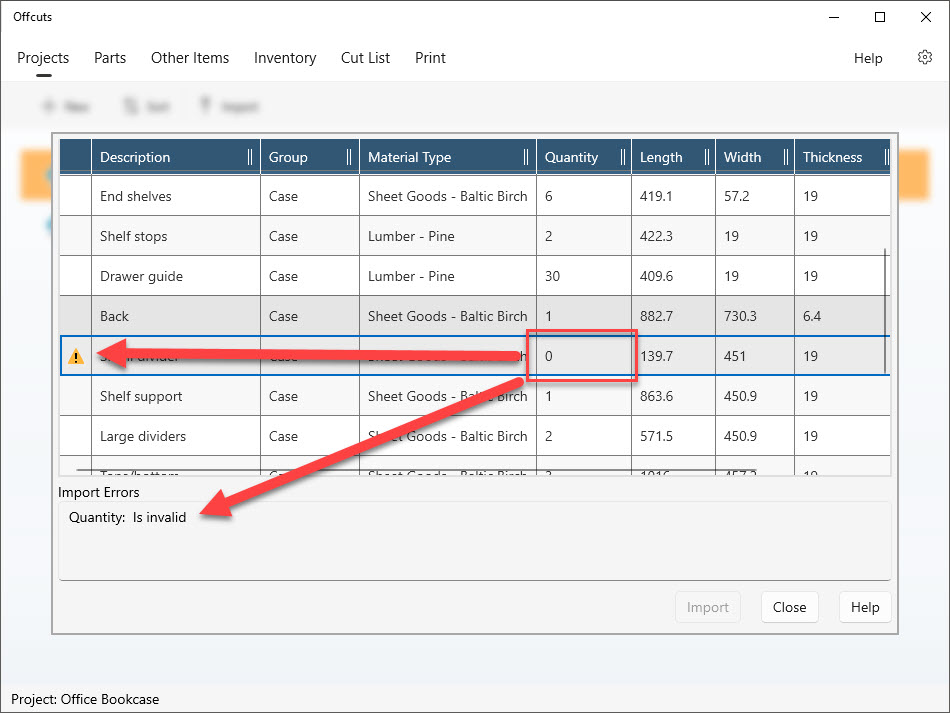
Validation
The validation dialog will help you correct any problems before importing the file into Offcuts.
To identify any issues, check the leftmost column for a warning icon.
Here's a summary of the import requirements:
Description: This field is required.
Group: This field is optional
Material Type: The material must exist in the inventory database
Quantity: Must be greater than zero
Length, Width, Thickness: Valid numbers are required. The format must match the current settings in Offcuts (do not include units)
Ignore Grain: Must be either "yes" or "no"
The validation dialog provides an initial check of your file's data, ensuring the values are correct. However, the Parts screen will perform a more thorough check after import to confirm that each part fits within the chosen material.
Editing
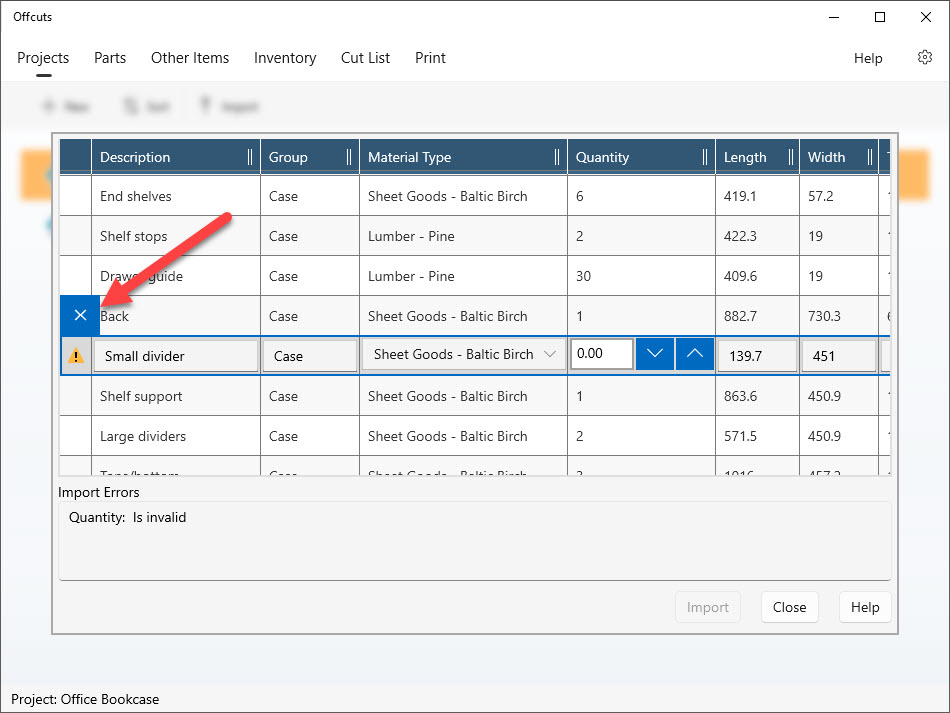
To modify any value in the validation screen, simply double-click on the corresponding row.
Click the 'x' button to cancel any edits.
To save your changes, either click outside the edited row or press the Import button.
Note
The Import button will only become active once all errors in the file have been resolved.
Exporting a Project File
Click the Export button and choose "Export to Excel".
Sharing Offcuts Database
Exporting a Project File
Click the Export button and select "Export Project". The exported file can then be shared with other computers or the iPad version of Offcuts.
Import a Project File
Click on the Import button and select "Offcuts Project"