Generating Cut lists
Warning Icon
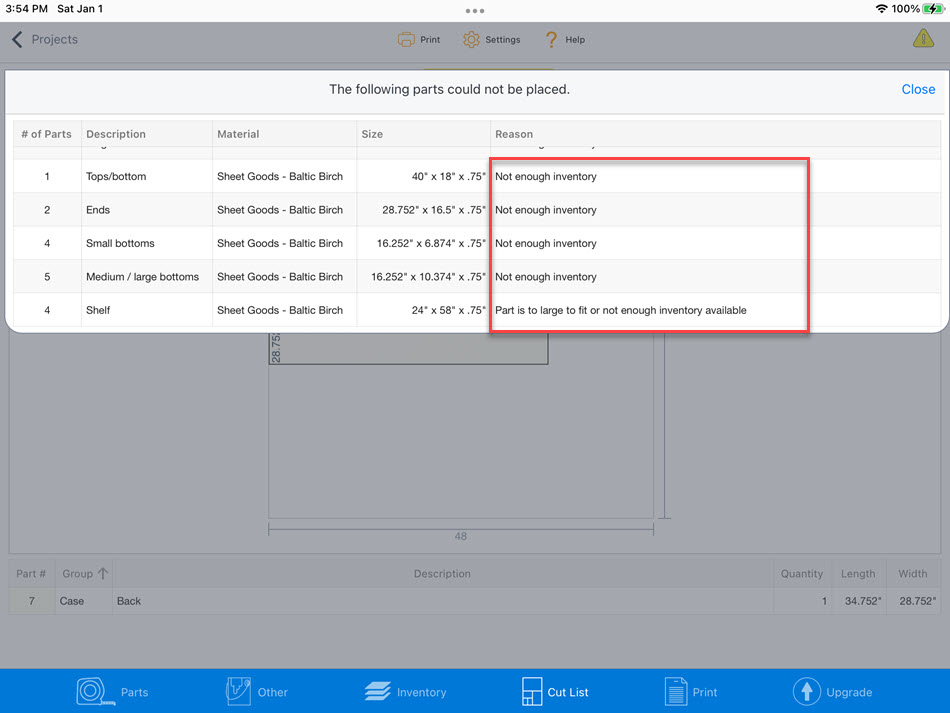
The warning icon will be displayed when Offcuts cannot generate a cut list for all your parts.
To see what parts were not able to be placed, tap on the Warning icon.

The list will display all the parts and the reasons. In this example, there were two problems. I ran out of material, and a piece is too large for the material I have available.
This list is scrollable, so swipe up and down to see more items - if applicable.
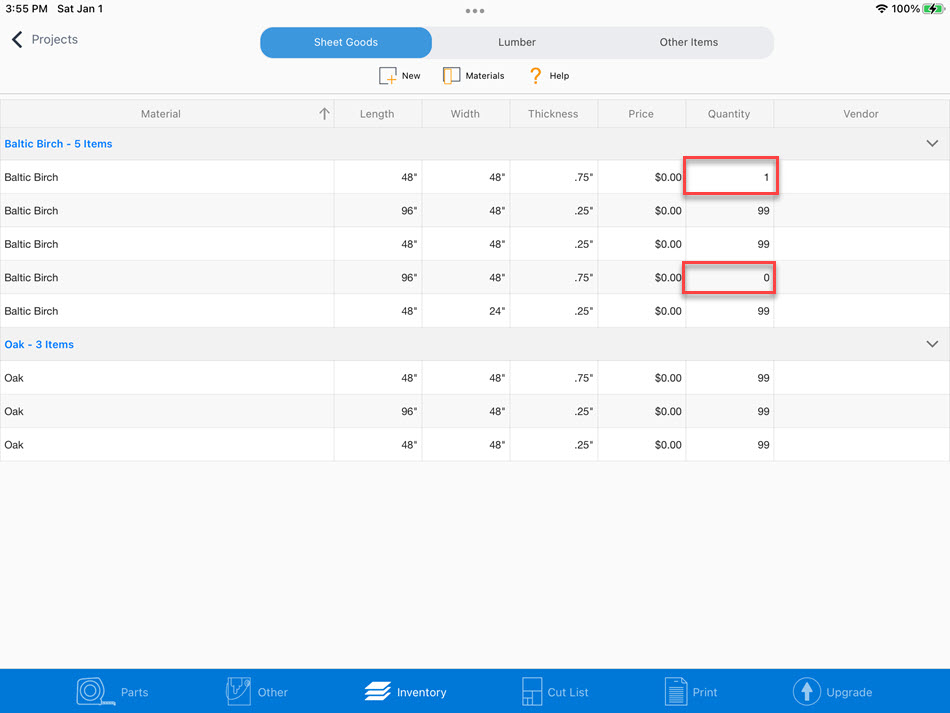
The Inventory screen will show that I don't have enough material available for my project. Once I increase the quantity, the error will go away.
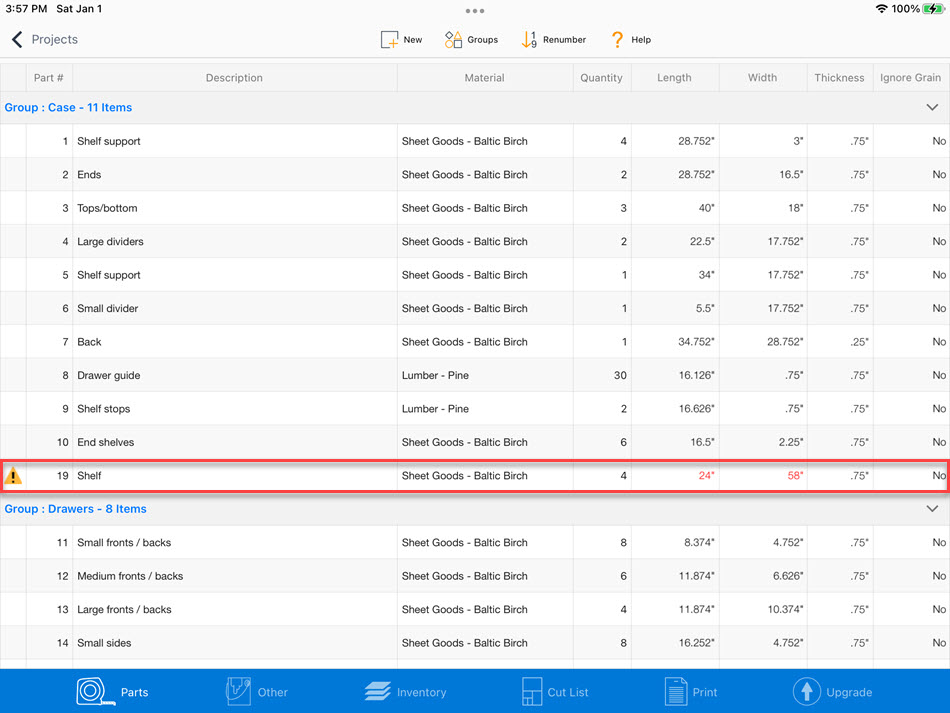
The Parts screen will show that I made an error when entering the width of the part. Instead of 58 inches wide, it should have been 38 inches. Once fixed, the error will go away as it will fit the material I have available.
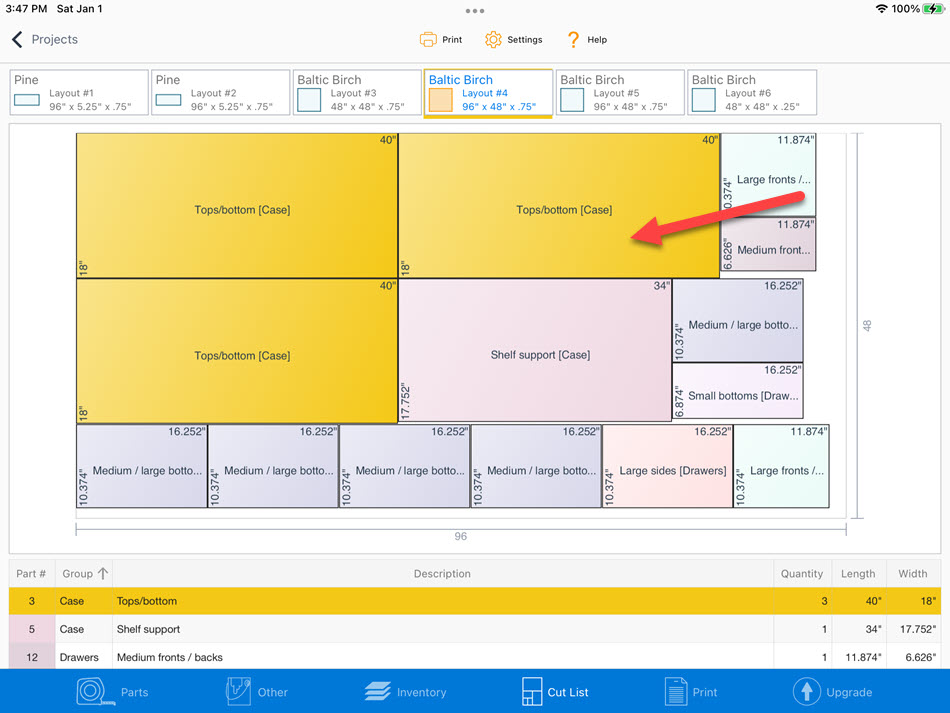
Highlight parts
Tap on a row in the grid
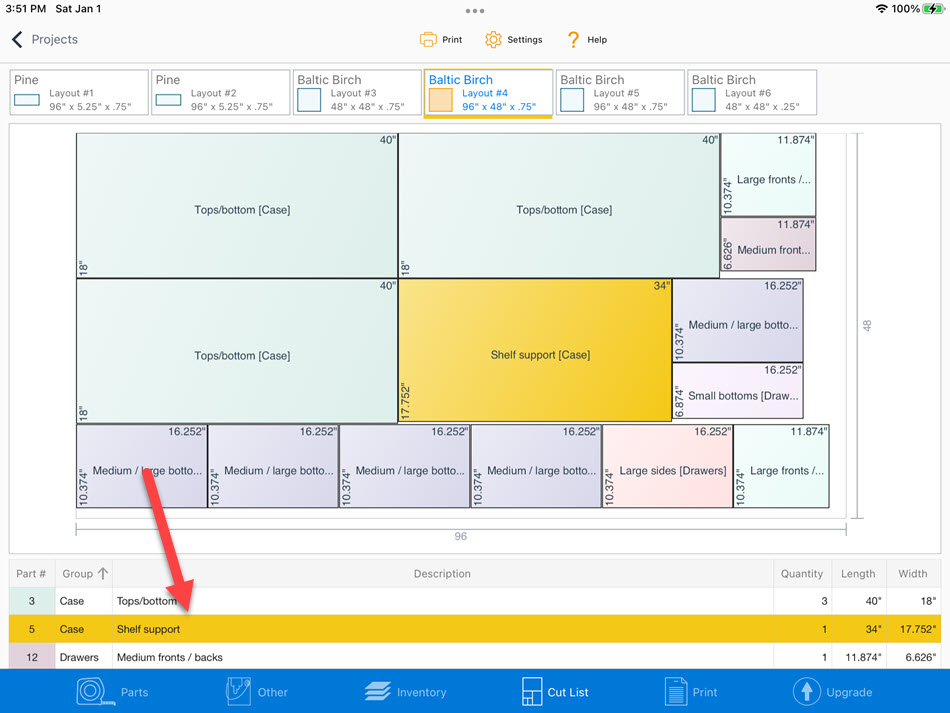
Or tap on a cut list part
Edit Part
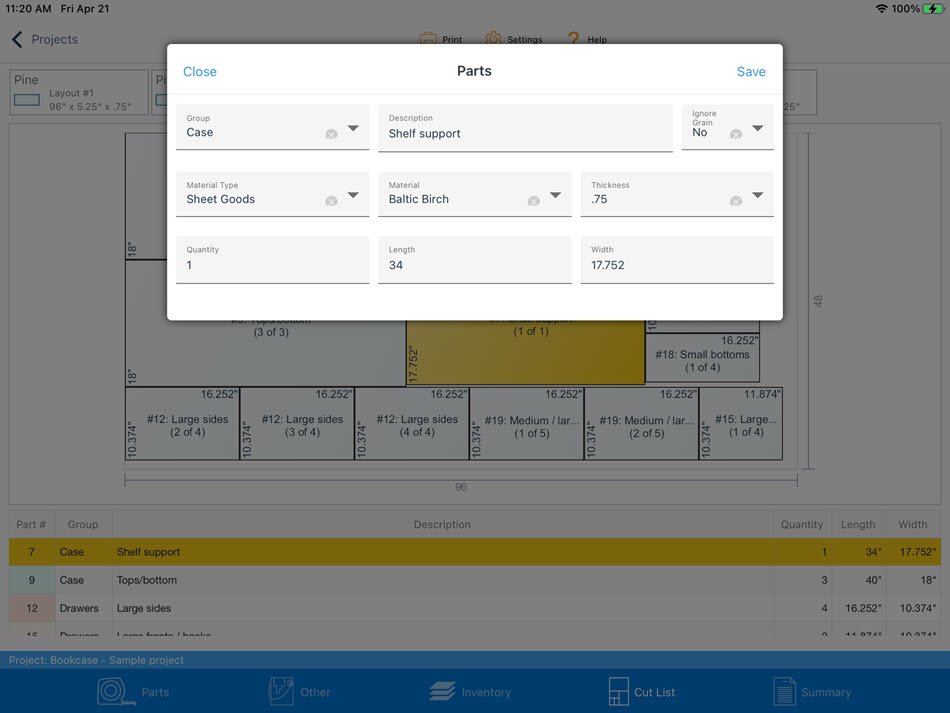
You can modify a part directly within the Cut List tab by either double tapping on the part on the cut list graphic or the part in the list.
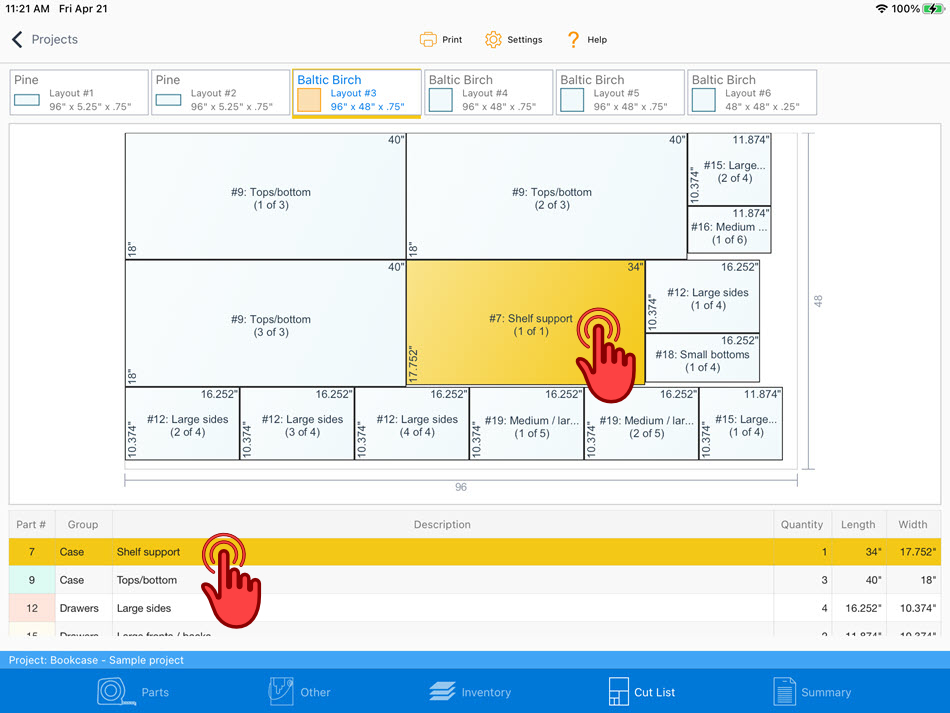
When editing a part in the Cut List tab, you can only edit a single part. The Next and Previous are not available.
Sorting columns
Tap on the column heading to sort. Tap multiple times for ascending, descending or natural order

Turn on/off part numbering
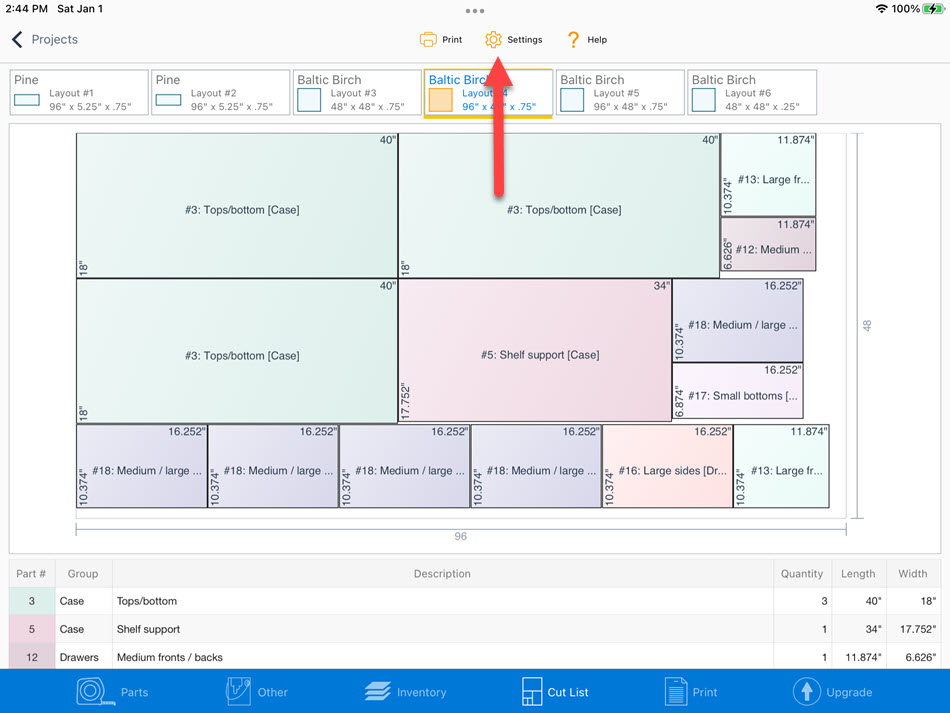
Tap on the Gear button

Slide the switch to turn numbering on or off
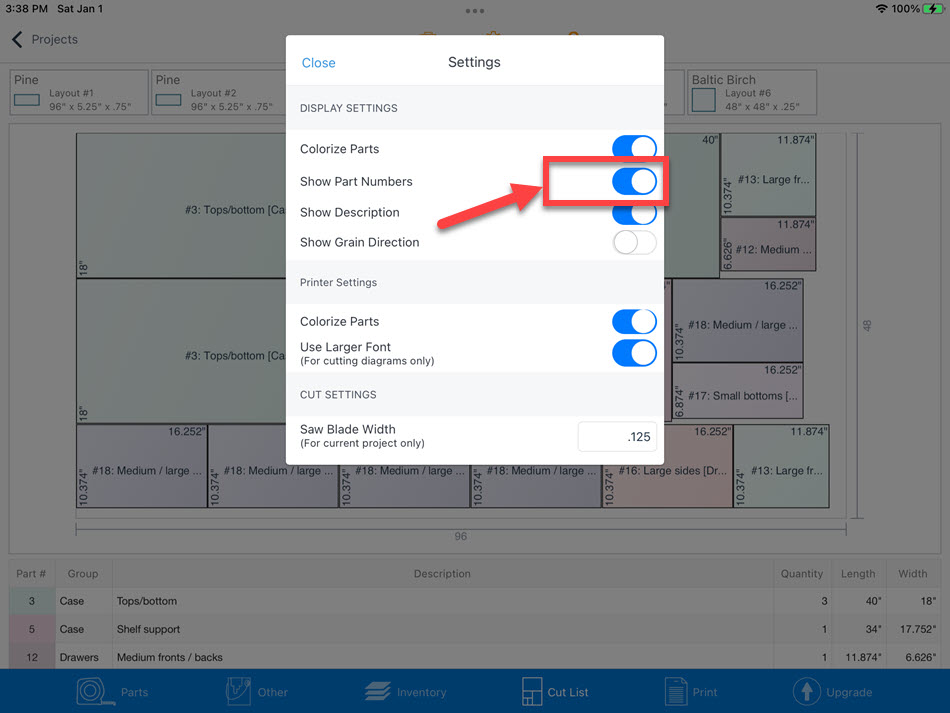
The number will no longer be shown
Turn on/off part coloring
Tap on the Gear button
Slide the switch to turn coloring on or off
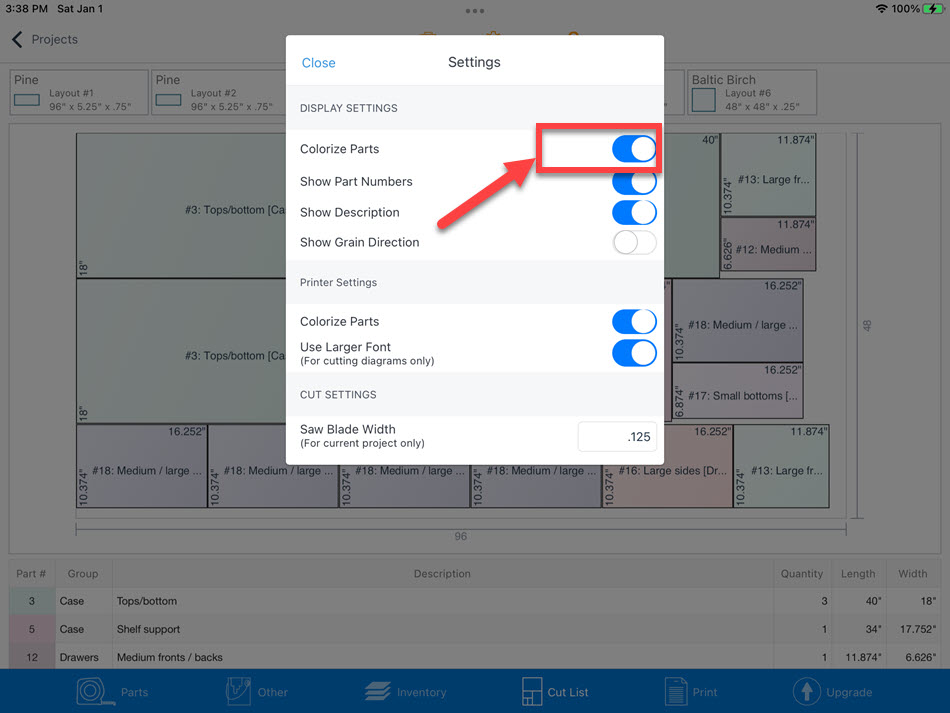
Color is now on

Show Grain Pattern
Tap on the Gear button

Slide the switch to turn grain on or off
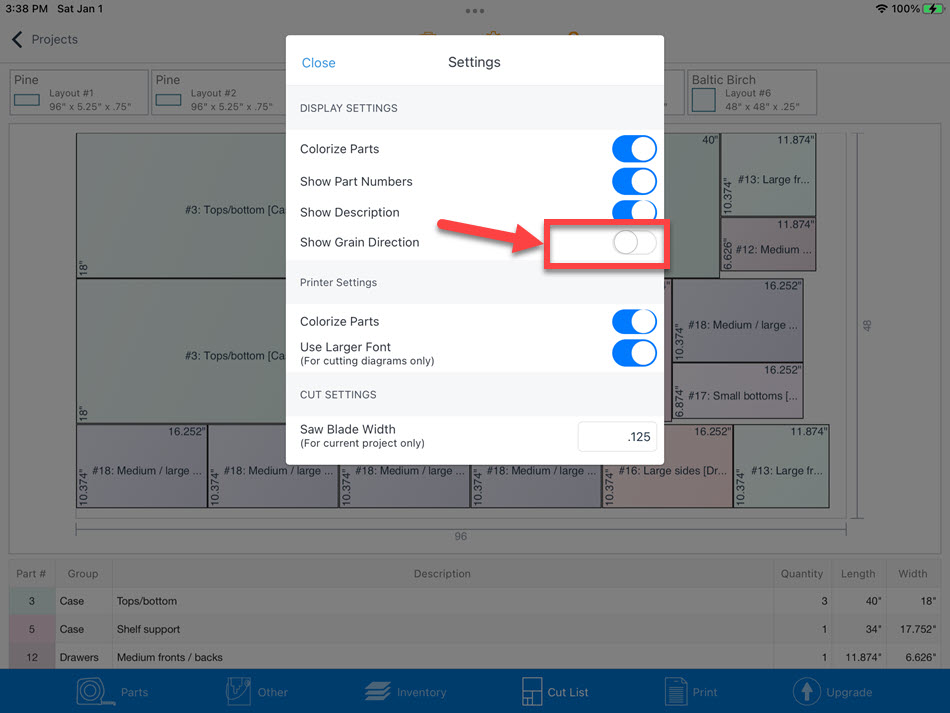
The woods grain pattern is now displayed
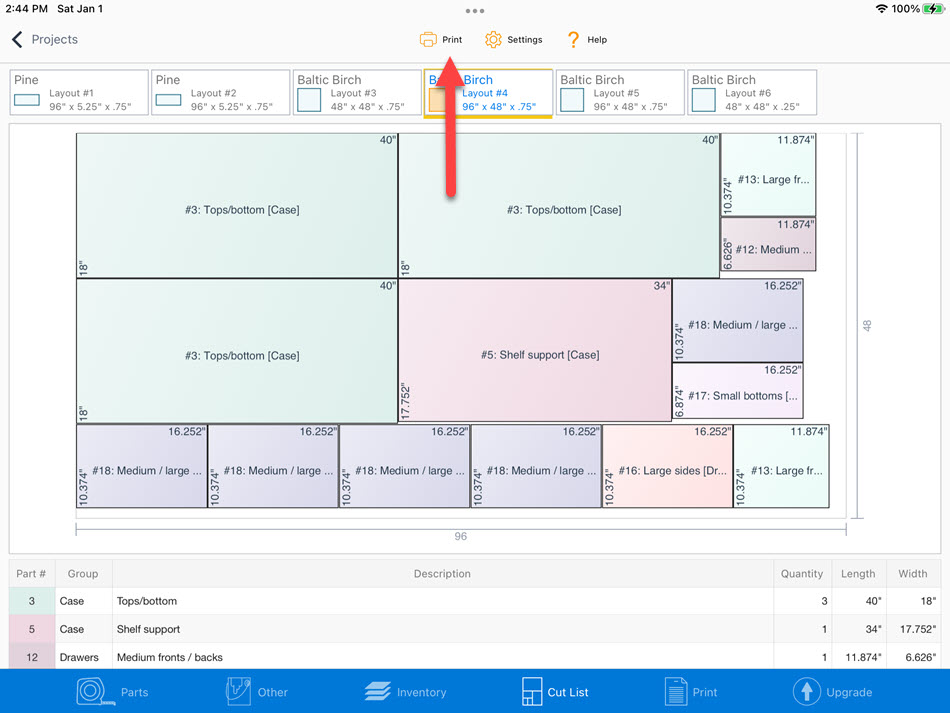
Quick Print
Quick-print will print the basic cut list information. For more detail, tap on the Summary button and generate a full report.
To access, just tap on the Print button
'Current Cut List' will print the visible cut list.
'All Cut Lists' will print all cut lists.
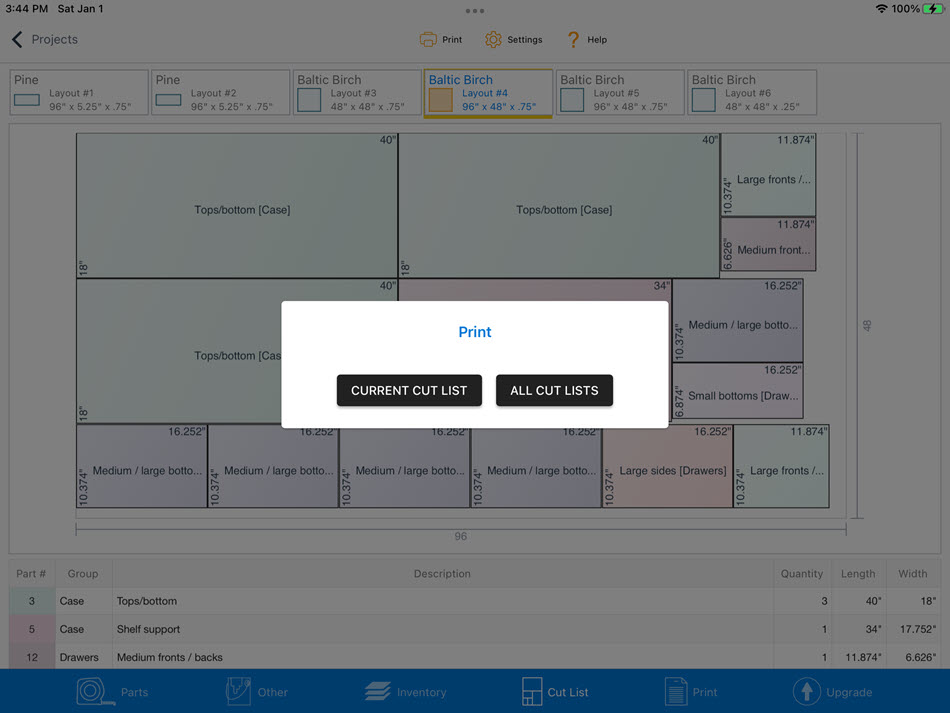
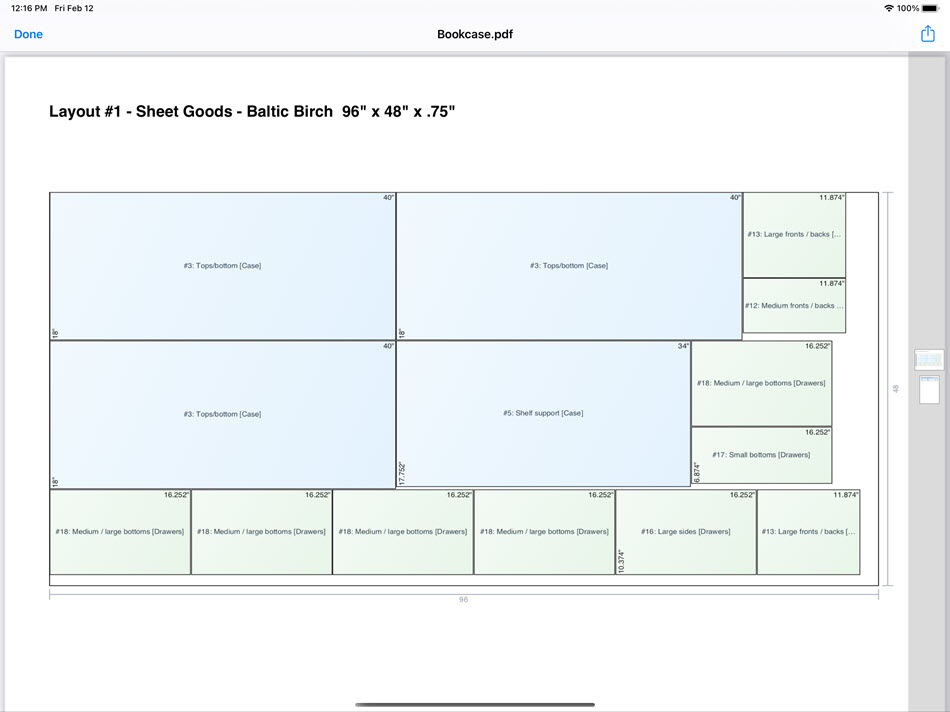
A PDF file will is generated and displayed. You can print or share this report.
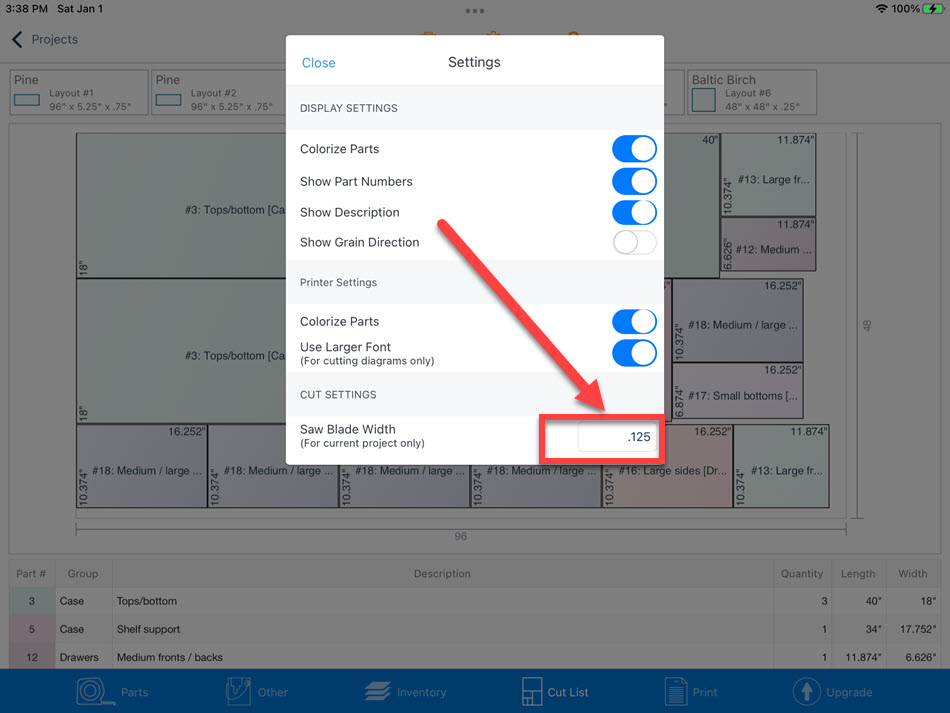
Saw Blade Kerf/Width
You can override the default saw blade width for the active project by tapping on the gear button.

Once you enter the new size, it will be saved with the project. The adjusted size will not affect any other projects.